How to Setup an Effective Campaign that Delivers Desirable Results for your Business
Introduction
In order to setup an effective campaign that delivers the kind of results that you desire, you’ll need to understand certain concepts and best practise for setting up Google Ads.
We held the first edition of our Google Ads Labs, a training event we plan to hold every month. If you were not able to join us for the training event, here are the tips the speaker shared with us. This article here focuses on the best way to setup Search Campaigns. You can check this other article for the best way to setup Performance Max Campaigns.
Here are the steps to follow in order to setup an effective campaign:
Step 1: Select a Campaign Objective 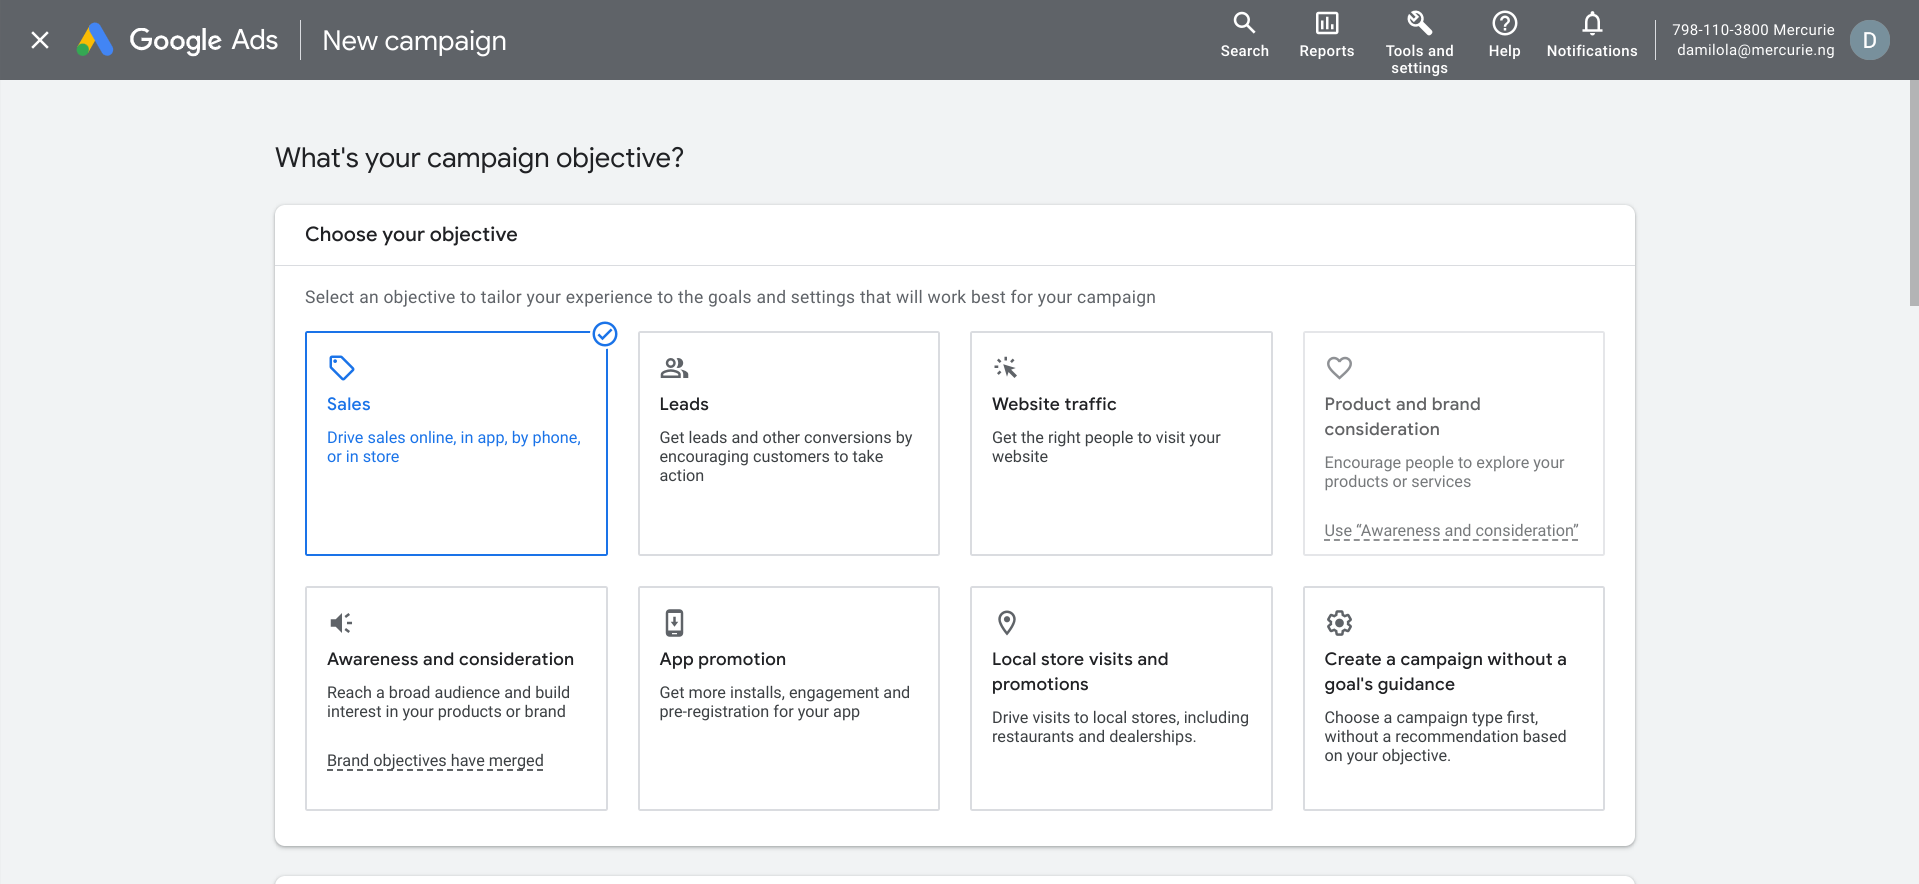 Setting up an effective campaign starts with choosing the right campaign Objective. Google Ads uses whichever campaign objective that you choose for the product or service you are promoting to suggest the right campaign type for your Ad. When it comes to runing Google Ads, the campaign objective that you choose determines the kind of result that you get from your ad.
A campaign objective could be Sales, Leads,Web traffic, Awareness and consideration, App promotion, Local store visits and promotions.
Step 2: Select a Campaign Type 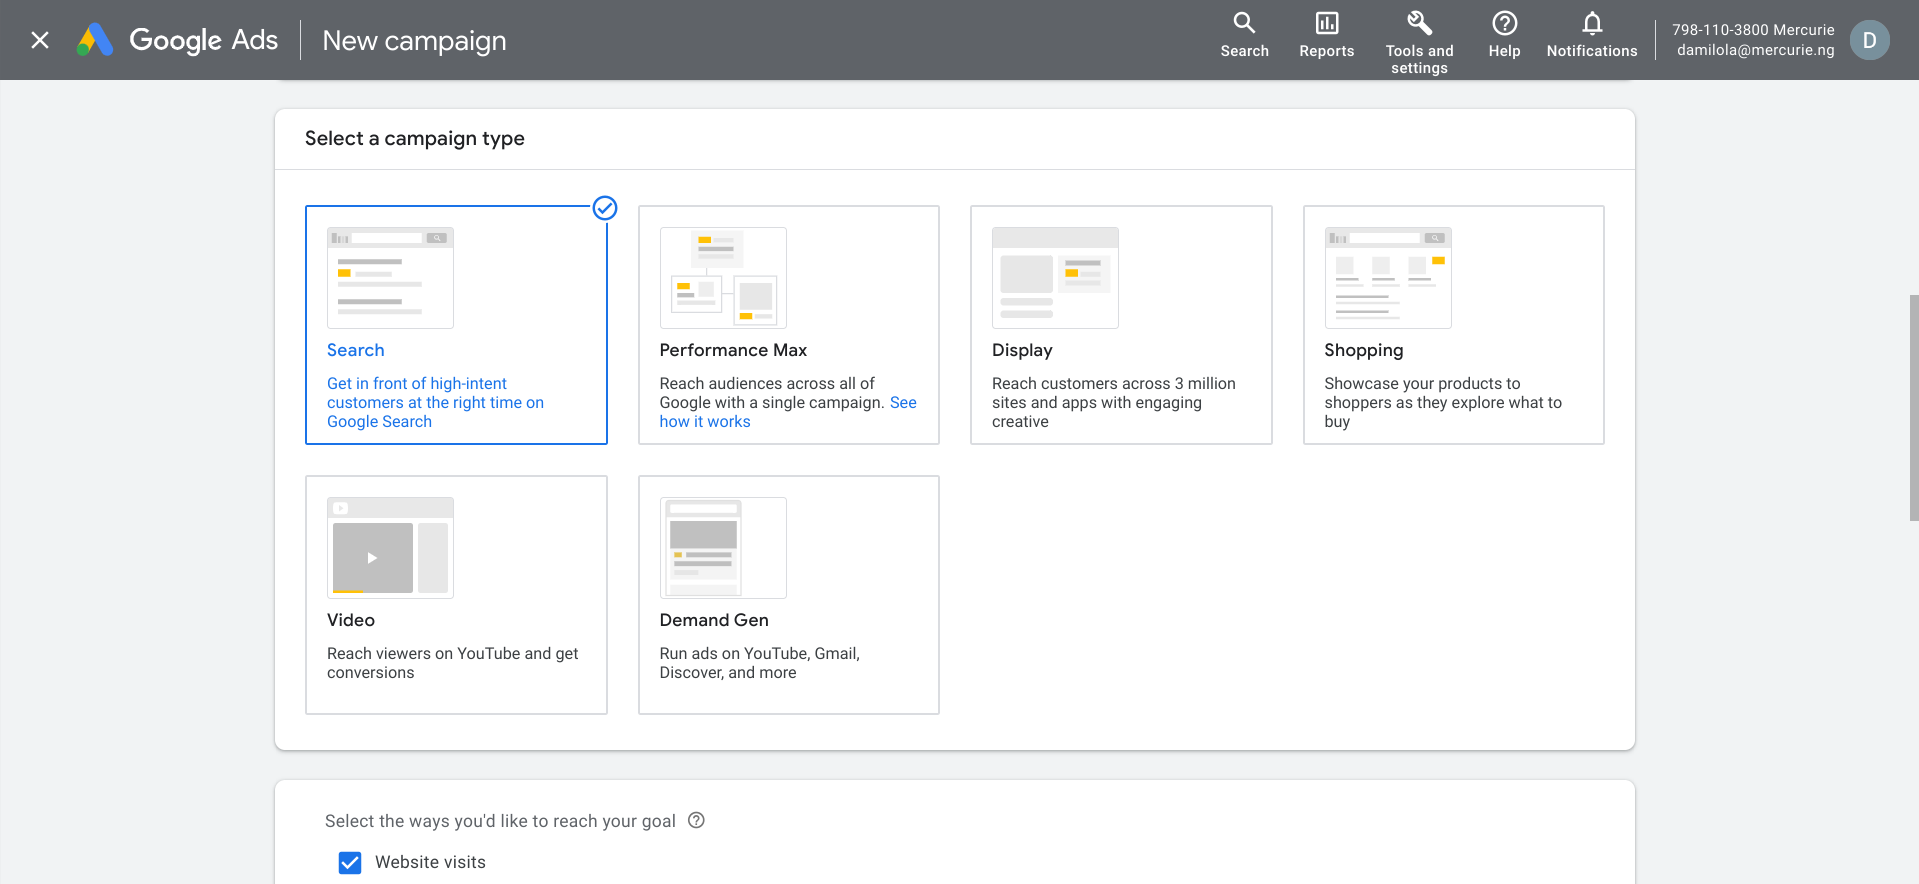
Depending on the campaign Objective you chose, Google ads will immediately show you the types of campaign that work perfectly well with your goal.
For example, if your campaign objective is Leads or Sales, the campaign types you will see would be Search, Performance Max, Display, Shopping, Video, and Demand Gen campaign types. Whereas, if you chose Awareness and Consideration as your campaign objective, the campaign type Google Ads would suggest would be Display, Video and Demand Gen.
Step 3: Select a way you would like to reach the Goal 
There are four ways you may want to reach your goal if your campaign objective is Sales and your have chosen the search campaign as the right campaign to reach your goal.
One way could be through website visits, the other way could be through phone calls, the third way could be through store visits (Physical store location), and the fourth way could be through App download.
Choose the one that best fit your business model or the type of product that you want to advertise. For example, let’s say you sell solar panels installation via a website then you will choose website visits as a way to reach your goal.
Step 4: Select Conversion Goal 
Once you choose a campaign type the next step that you need to take is to select a conversion goal. Make sure to pick the most important conversion goals that you would like to focus on.
For example, let’s imagine that your campaign objective is Sales, and you have also chosen the type of campaign that is perfect for your objective and your product, the right conversion goal for you would be Purchase.
Step 5: Enter a name for your Campaign

When choosing a name for your campaign, a good convention you can follow is to name the campaign according to the campaign object dash the campaign type dash a number dash the month dash the product you are advertising for that campaign.
In the example above, we named the campaign “Sales-Search-1-October-SolarPanels” because we are setting up a campaign for our solar panel product.
Step 6: Turn on Enhanced Conversion
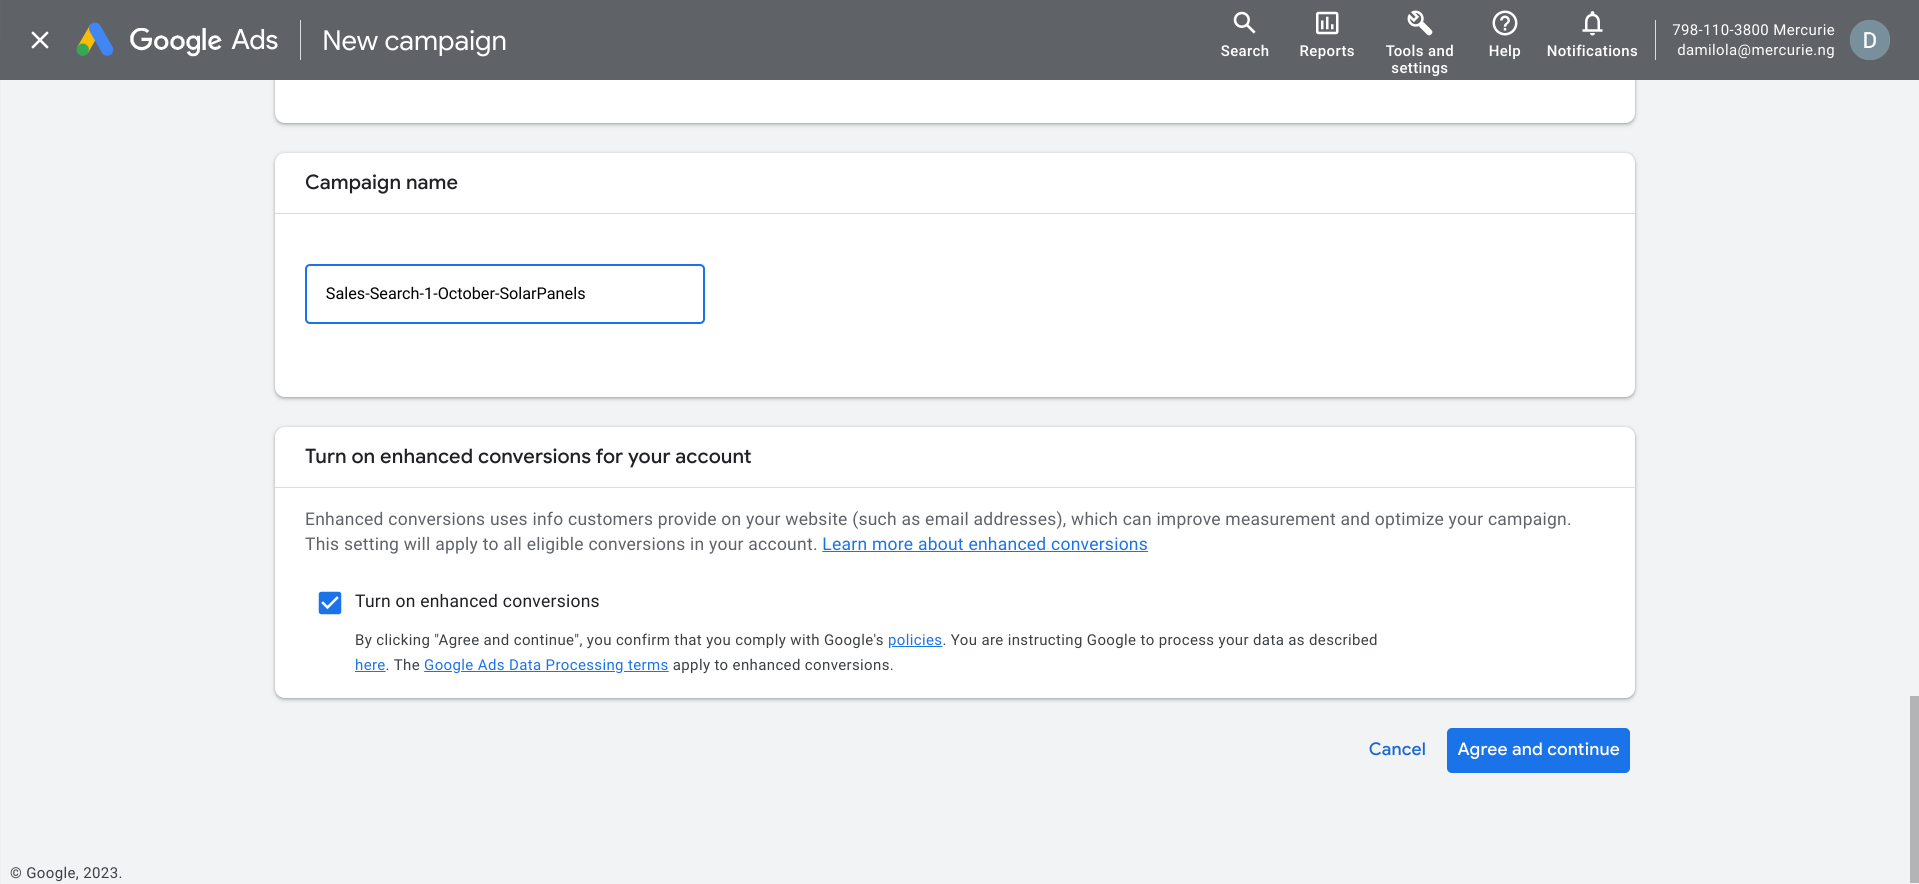
Enhanced conversions uses info customers provide on your website (such as email addresses), which can improve measurement and optimize your campaign. This setting will apply to all eligible conversions in your account.
Once you tick the box that turns it on, click on the “Agree and continue” button to proceed.
Step 7: Select Bidding
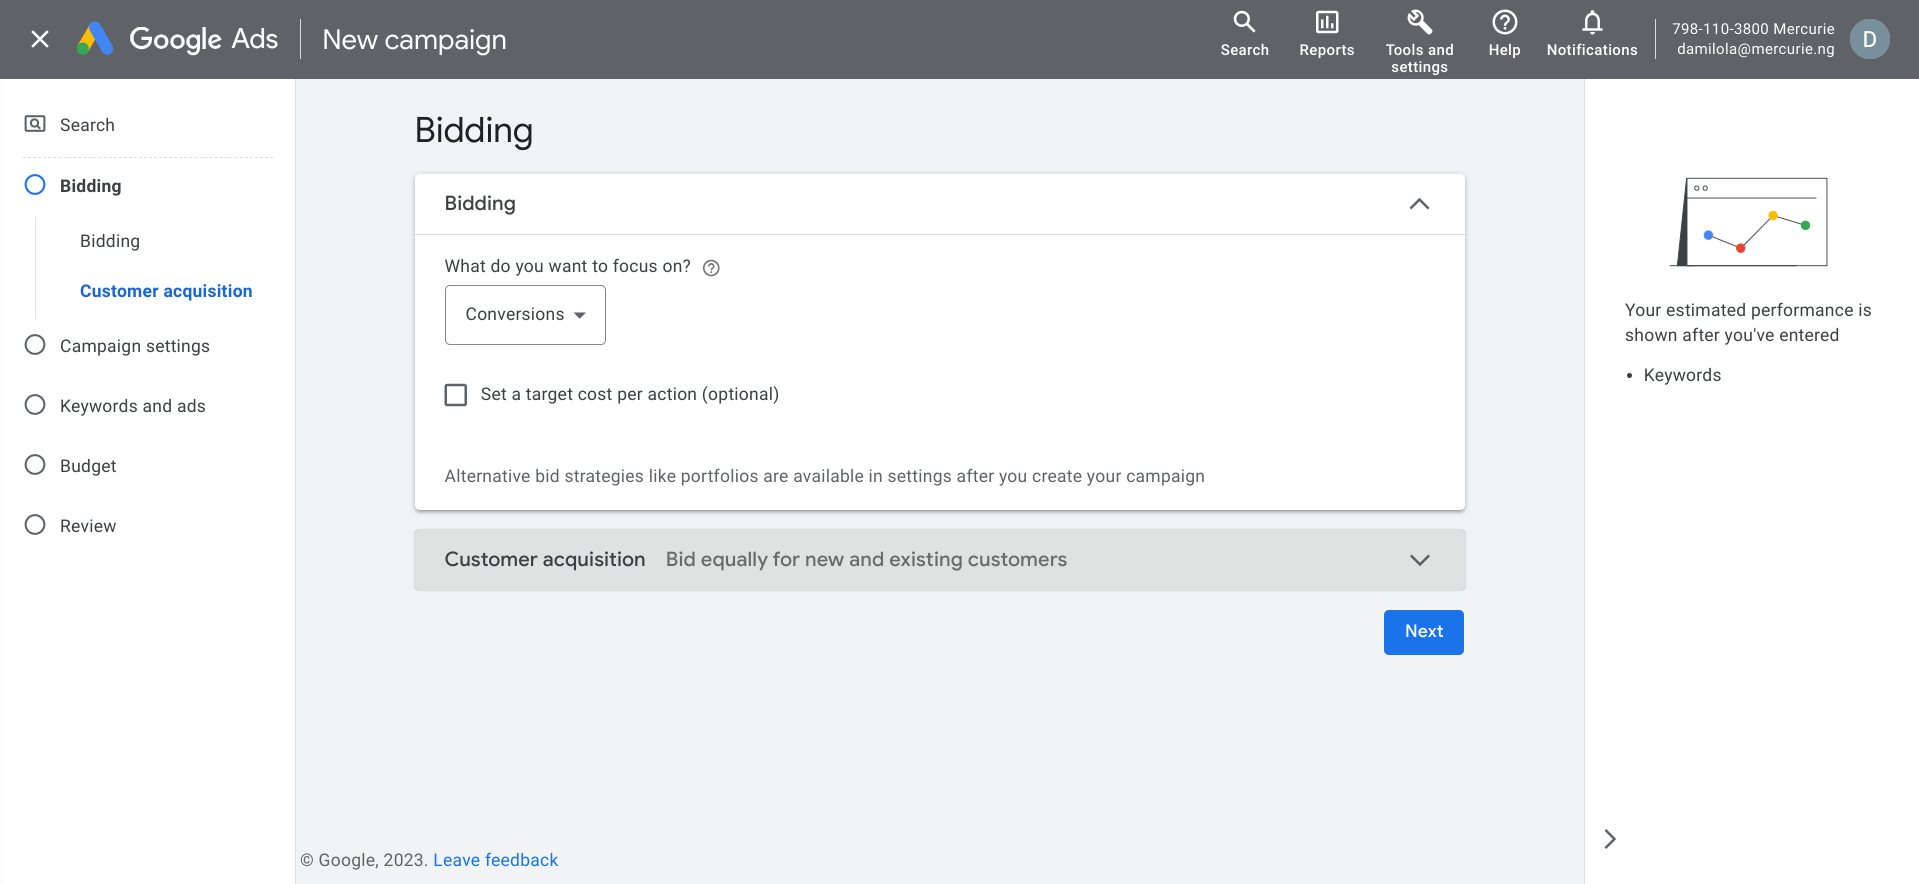
Bidding is where thing begin to get interesting when it comes to setting up an effective Google ad campaign that delivers desirable result. This is beacsue this is where we get into details of how this particular campaign would run.
In the case of our solar panel business example, we want people to reach out to us for actual solar panel installation. Therefore we bid for conversions. Conversions are actions on your website, app or store such as filling a signup form.
Step 8: Set a Target Cost per Action (Optional)
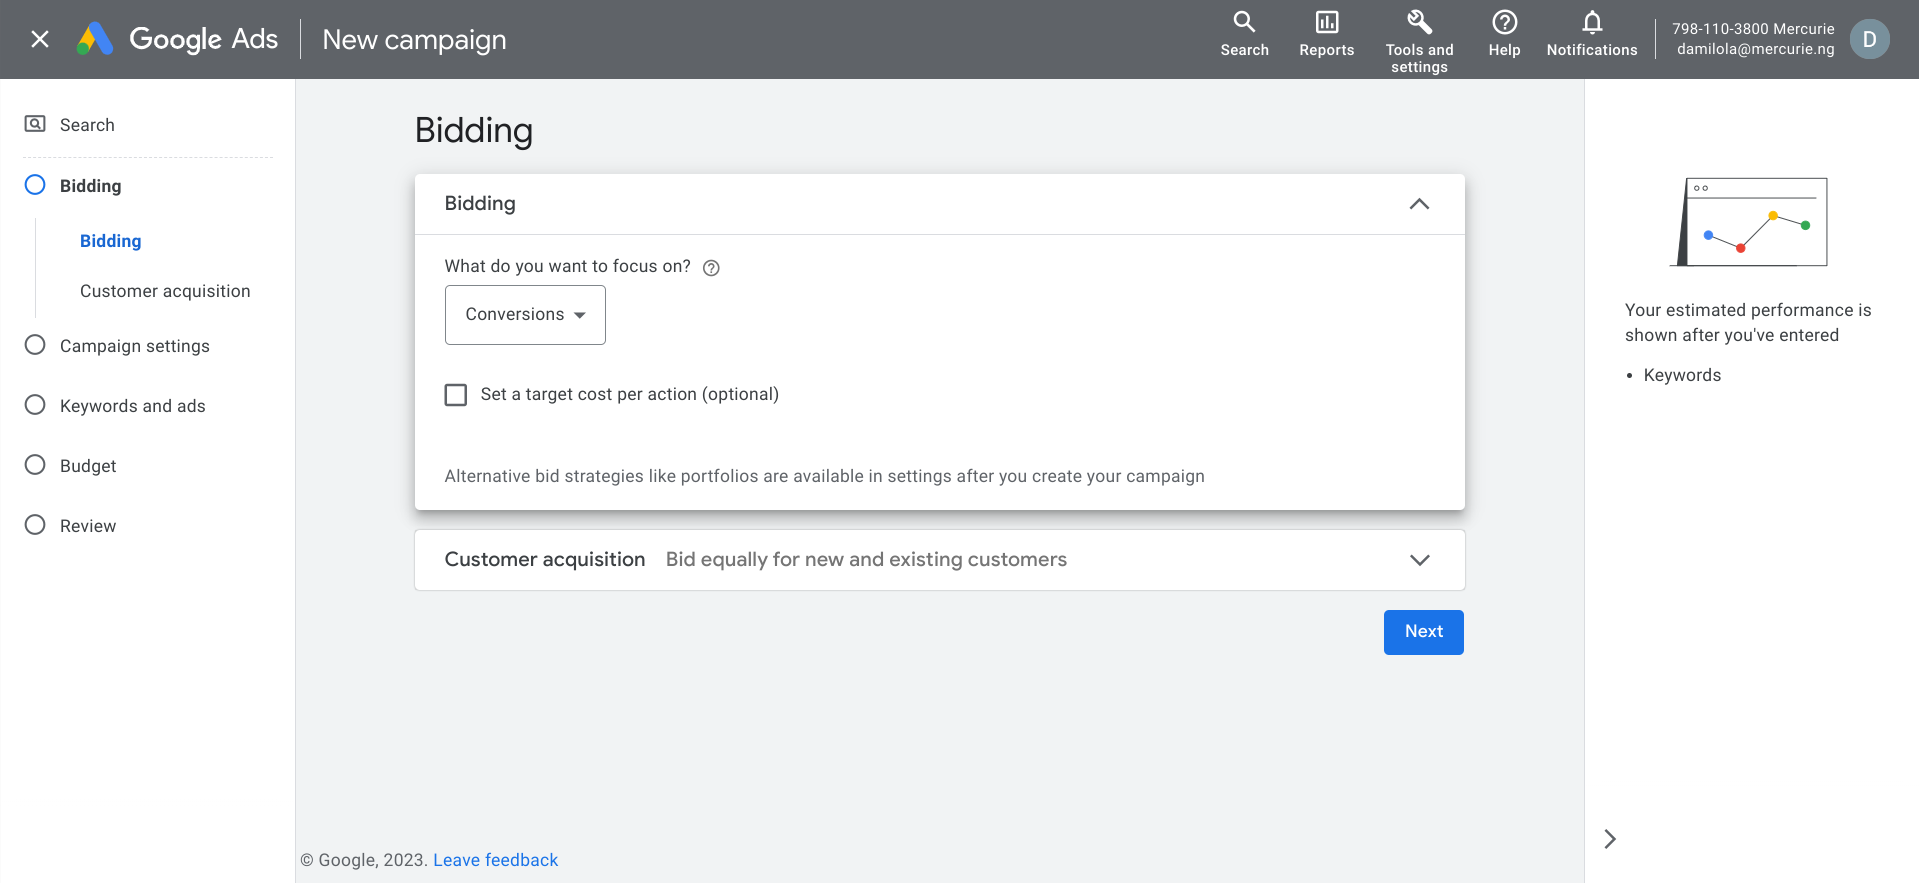
Setting a Target Cost per Action is useful if you have a specific amount you can use as a benchmark for per the action you wish to get, in our case conversion.
However, if you are a new business and you do not have any historical data to back a specific amount you have in mind, it is very unclear how to determine a target CPA for this scenerio.
In this case we typically recommend that you don’t set a target cost per Action initially when setting up the campaign. You want to let the campaign learn for a learning period of between a week or two to get a sense of what your cost per conversion looks like and on that basis you can now come back and set a Target Cost per Conversion.
For our example, we are going to proceed to campaign settings without a Target CPA by click on the “Next” button.
Step 9: Setup your campaign settings
Select or de-select Networks

For Network, you have the option to opt into the Search and Display Networks. In simple English, the Search and Display Networks are Google Partner that allow Google to show Ads (your ads) on their sites. This essentially extend the reach of your Search or display ads to hundreds of non-Google websites. The also include Youtube and some Google sites.
Examples of Google search partners include search engines such as bing.com and Google sites such as YouTube, Google Groups, Google Maps, Google Images, Google Shopping, etc .
For Google display partners and example would be a new paper media website such as Vangaurad.com or the Gueardian.com. In the case of our business, a potential customer who is showed interest in solar panel earlier in the day could be show our solar panel ad on Vanguard for example later in the day while he was checking the news on the news media site.
However, if you don’t expect your customers to find you in any of these places, you can de-select both or either.Select a Location and Location Option.

Selecting a location to target largely depends on which country you want your ad campaign to target. If your business is trying to reach customers in Nigeria, the you will choose Nigeria as your location.
Another control selection to consider is Location options. Essentially there are two ways to target a location. The first one which is Presense or interest is selected by default and this means that a customer might be in Canada but is interested in what’s going on in Nigeria. So your Ad will be shown to such customer. Depending on the customer’s intent this might or might not make sense for your business, so you may want to think this through before making the decision to choose this option.
If your aim is to only reach people in Nigeria who are intrested in buying your product, then you can switch your location option to Presence. This means that only people who are in Nigeria will see your ad. 
Alternatively, you can enter a specific location that you want your Ad to be targeted to when you select the “Enter another location” option. Also with the option, you can exclude specific places. This is useful in a case where for example, you don’t ship to certain states. You can exclude those states from seeing your Ad since you don’t ship there. Not excluding them will mean that you are literally wasting money to reach people that you can’t serve.
Select Language
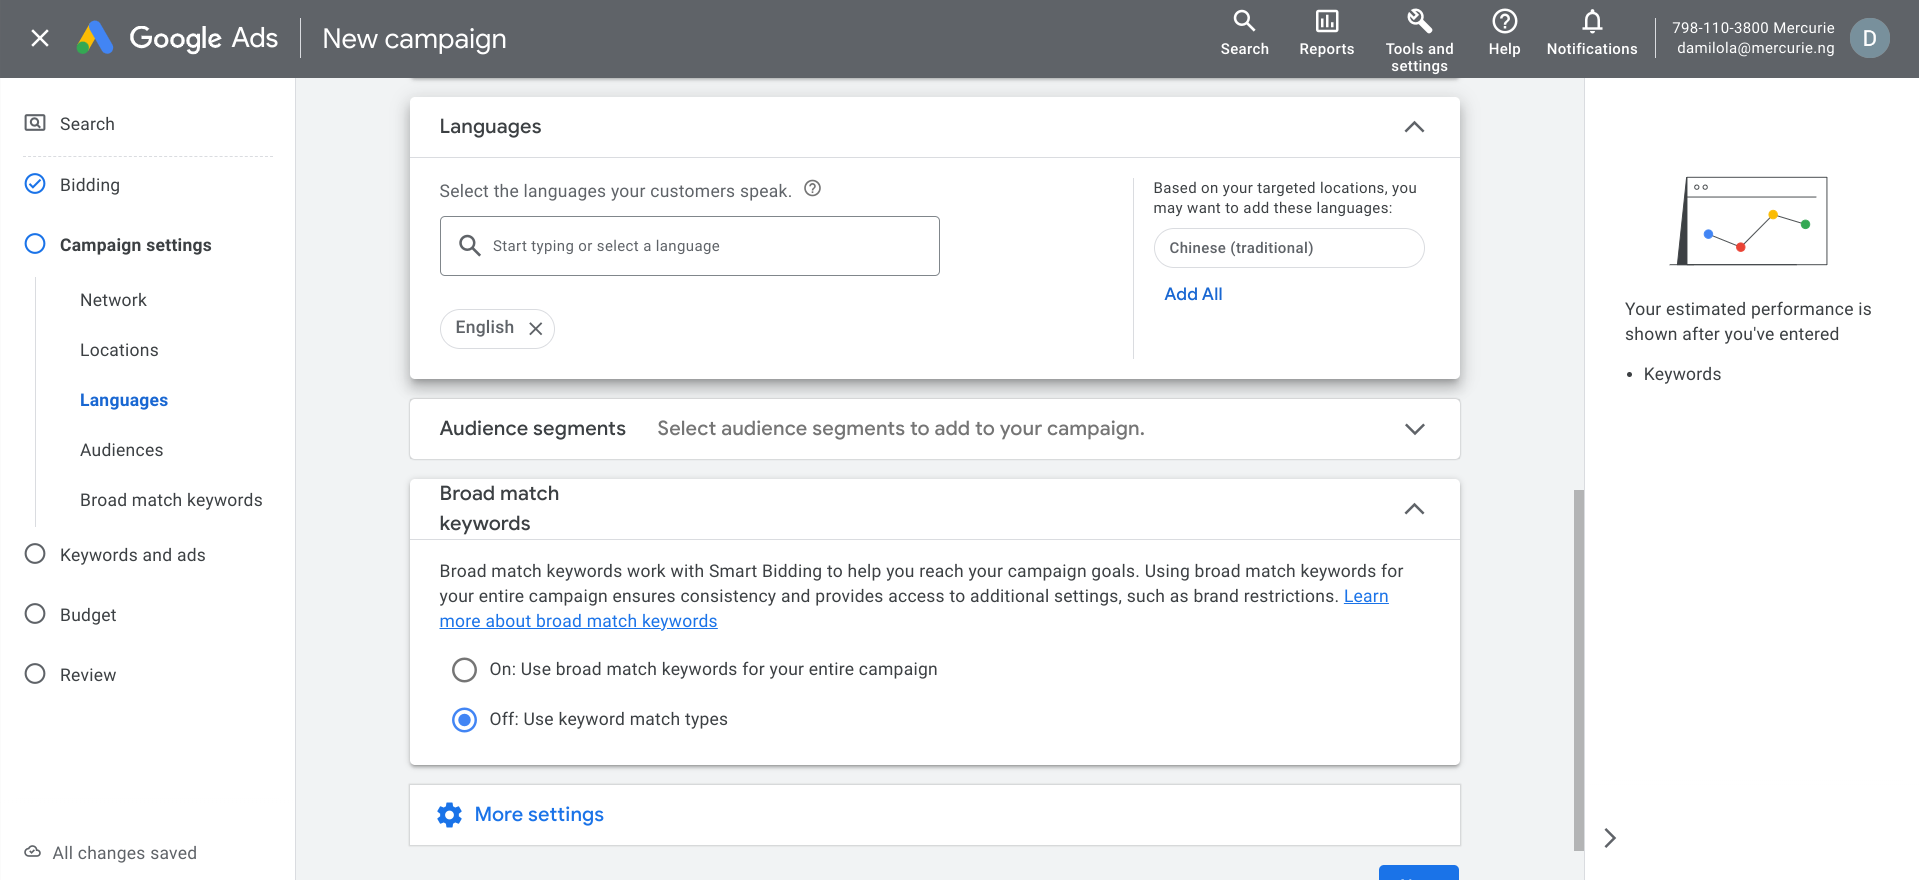
Ordinarily, if your product or service target audience are in Nigeria, then the language you want to use is English. This is always selected by default so you can simply skip the step.
Broad Match Keywords

This section is really important because essentially broad match keyword determines how your Ad is triggered. In order to understand this better, we will use our solar panel business example again.
Let’s imagine that one of the keyword we used for our campaign is “solar panels in Lagos” but as an exact match. This means that our ad will only show up in searches with the exact search term “Solar panel in Lagos”, nothing more.
So if a potential customer had searched for “Solar panel installations in Lagos” our ads will not show up because we used an exact match keyword for the ad. Now from a business standpoint, this might limit the number of people your ad can reach which is why broad match keywords are recommended.
Set Ad Rotation
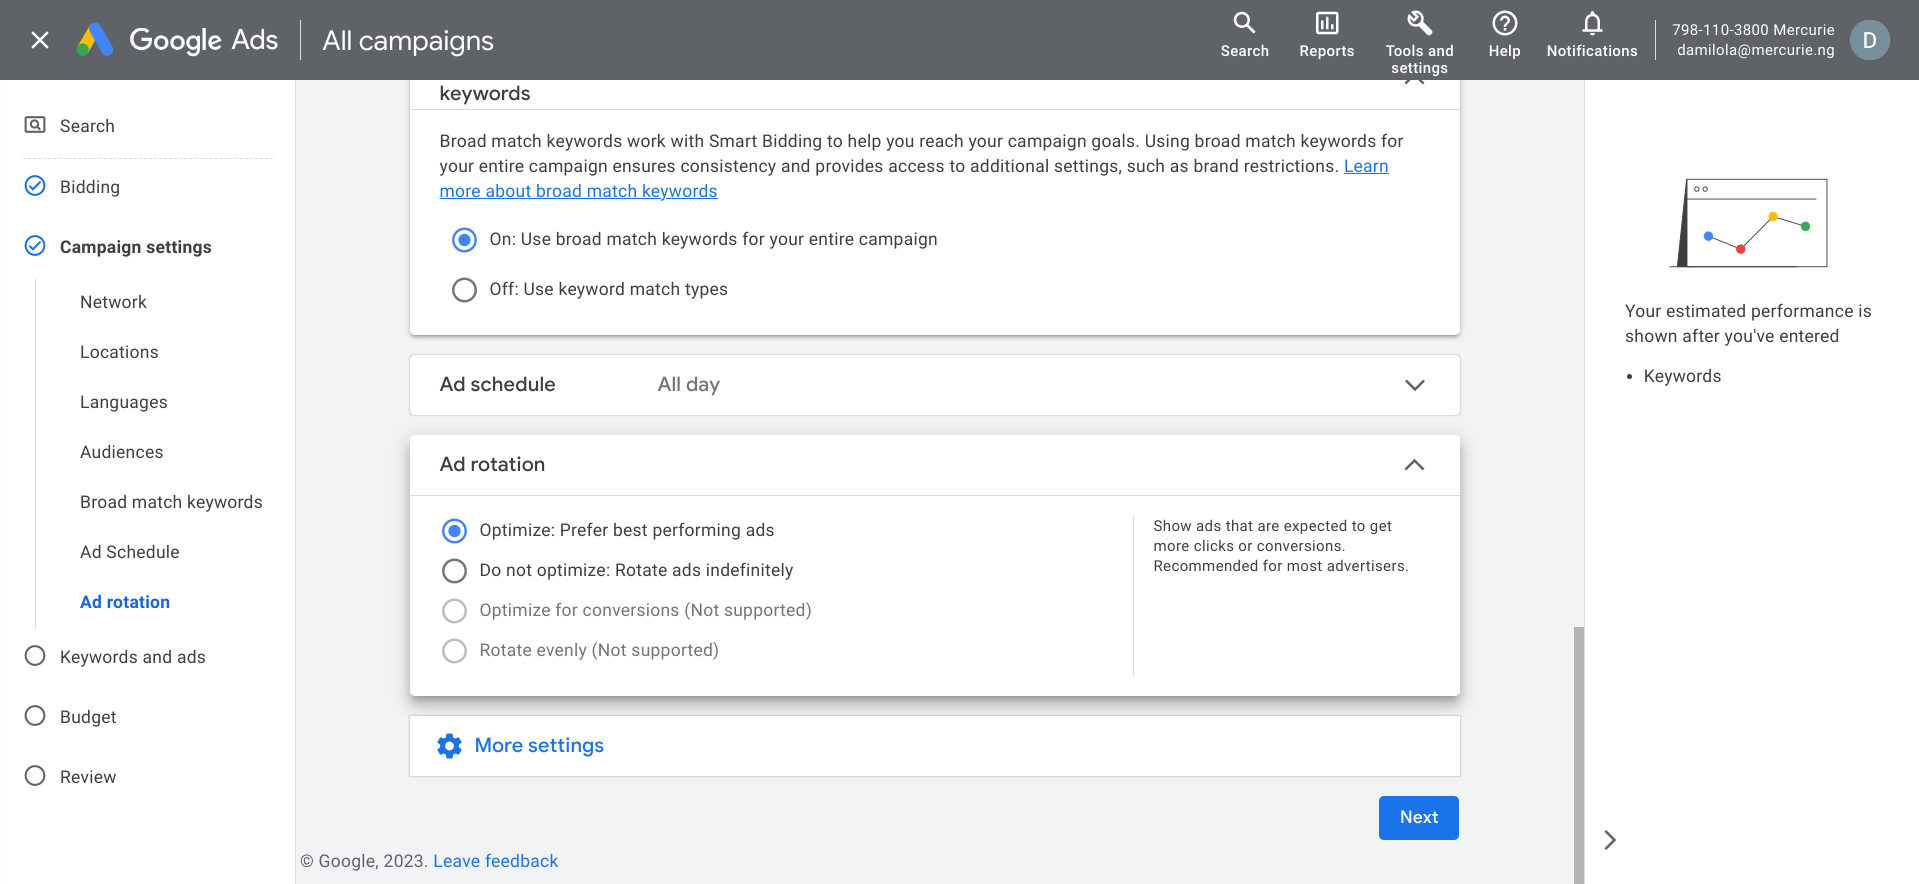
The "Ad rotation" setting allows you to specify how often you’d like the ads in your ad group to be served relative to one another. There are 2 settings for ad rotation: "Optimize" and "Do not optimize".
The “Optimize” settings prioritizes ads that are expected to perform better than other ads within an ad group. While the "Do not optimize" option delivers your ads more evenly into the ad auction for an indefinite amount of time.Your decision here is largely based on how you want your ads to be shown.Set Ad Schedules (Optional)
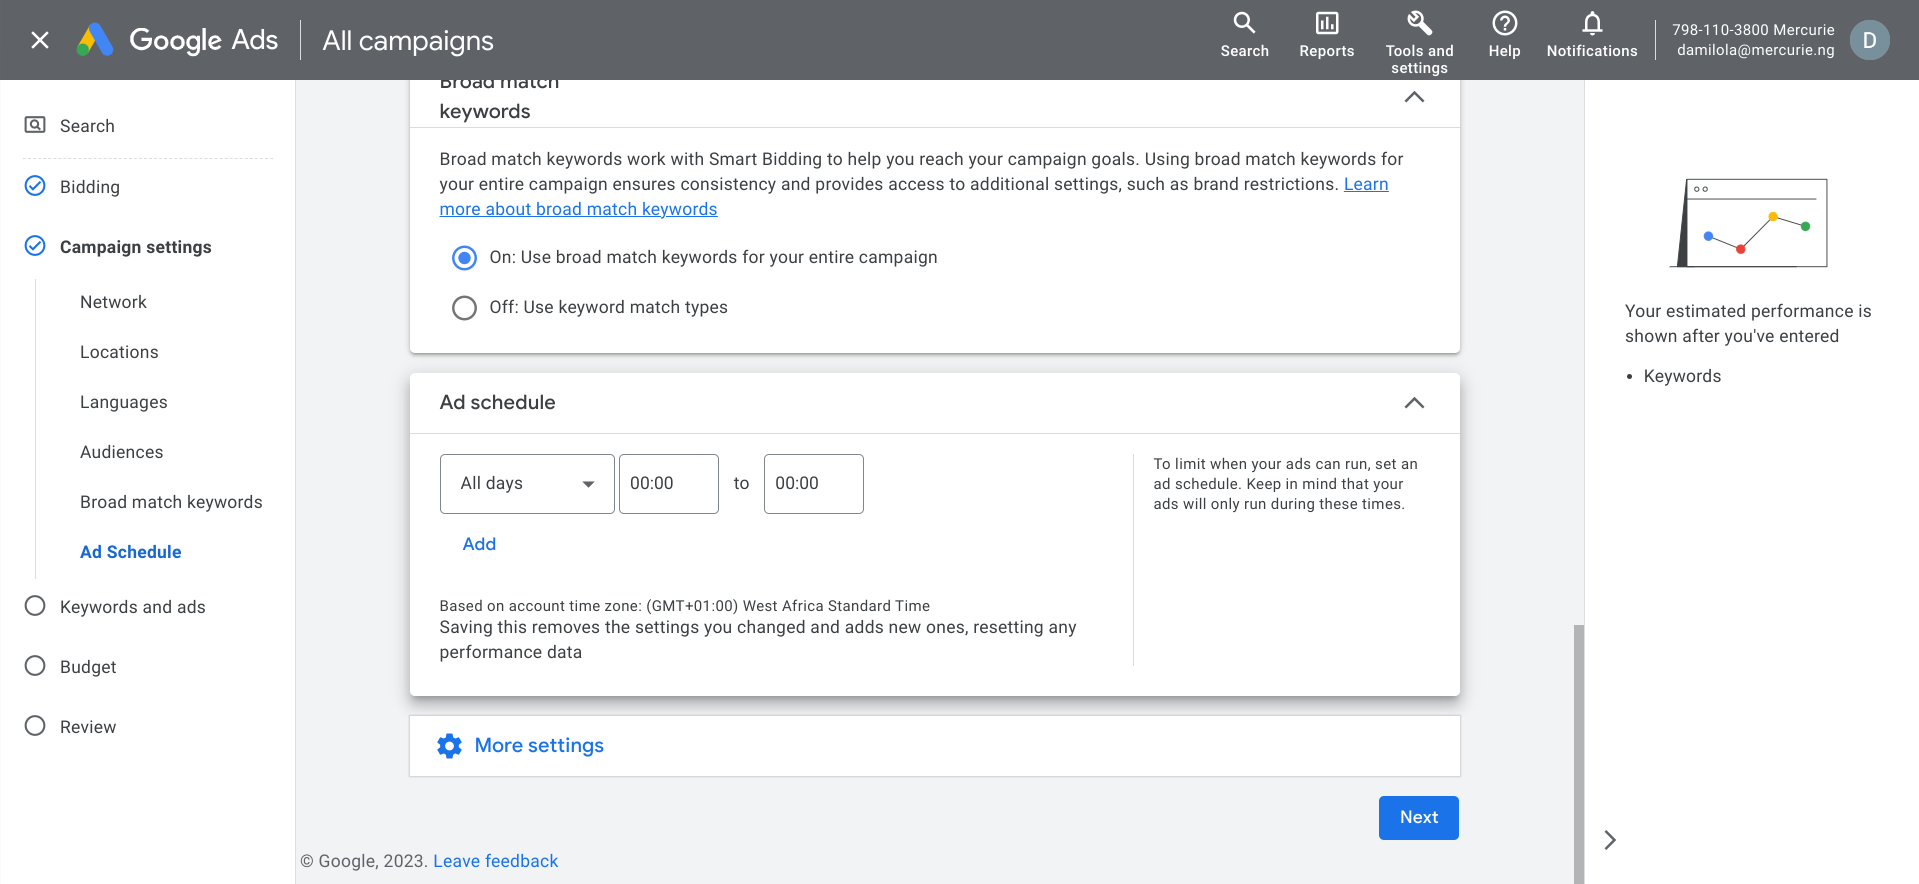
Try not to set an ad schedule because when you do you restrict the system from showing your Ads all day. So you want to leave it as it is so that your Ad can show all day.
Start and End date
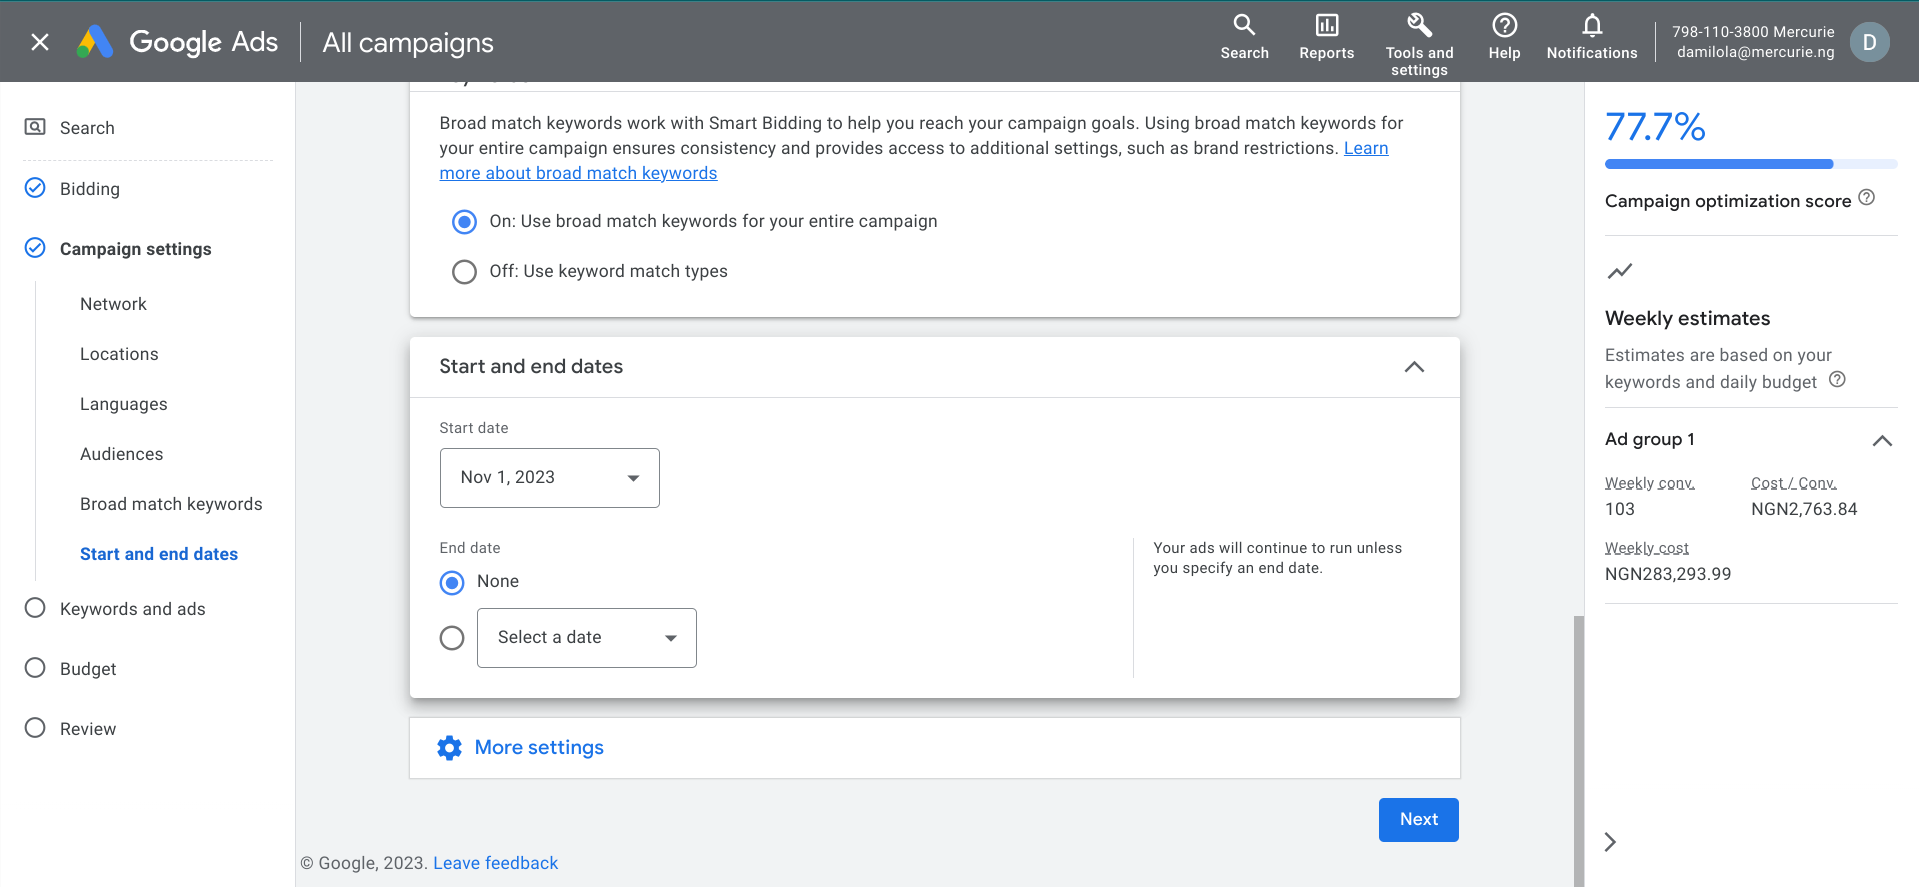 When it comes to setting a start date and an end date for your campaign, the best practice is to set your start date to the date you want the ad to start running, but never set an end date. This is because setting an end date means that the ad would stop runing at the particular end date.
This ultimately disrupts the ad’s learning phase and when you resume the ad after it had ended, it will have to re-learn all over again and its performance might suffer. So the best practice is to set the end date to “None”. However, if you wish to take a break with the campaign all you need to do is simply go back to campaign settings and then “pause” the Ad.
Step 10: Set Keywords and the Ad
Keywords
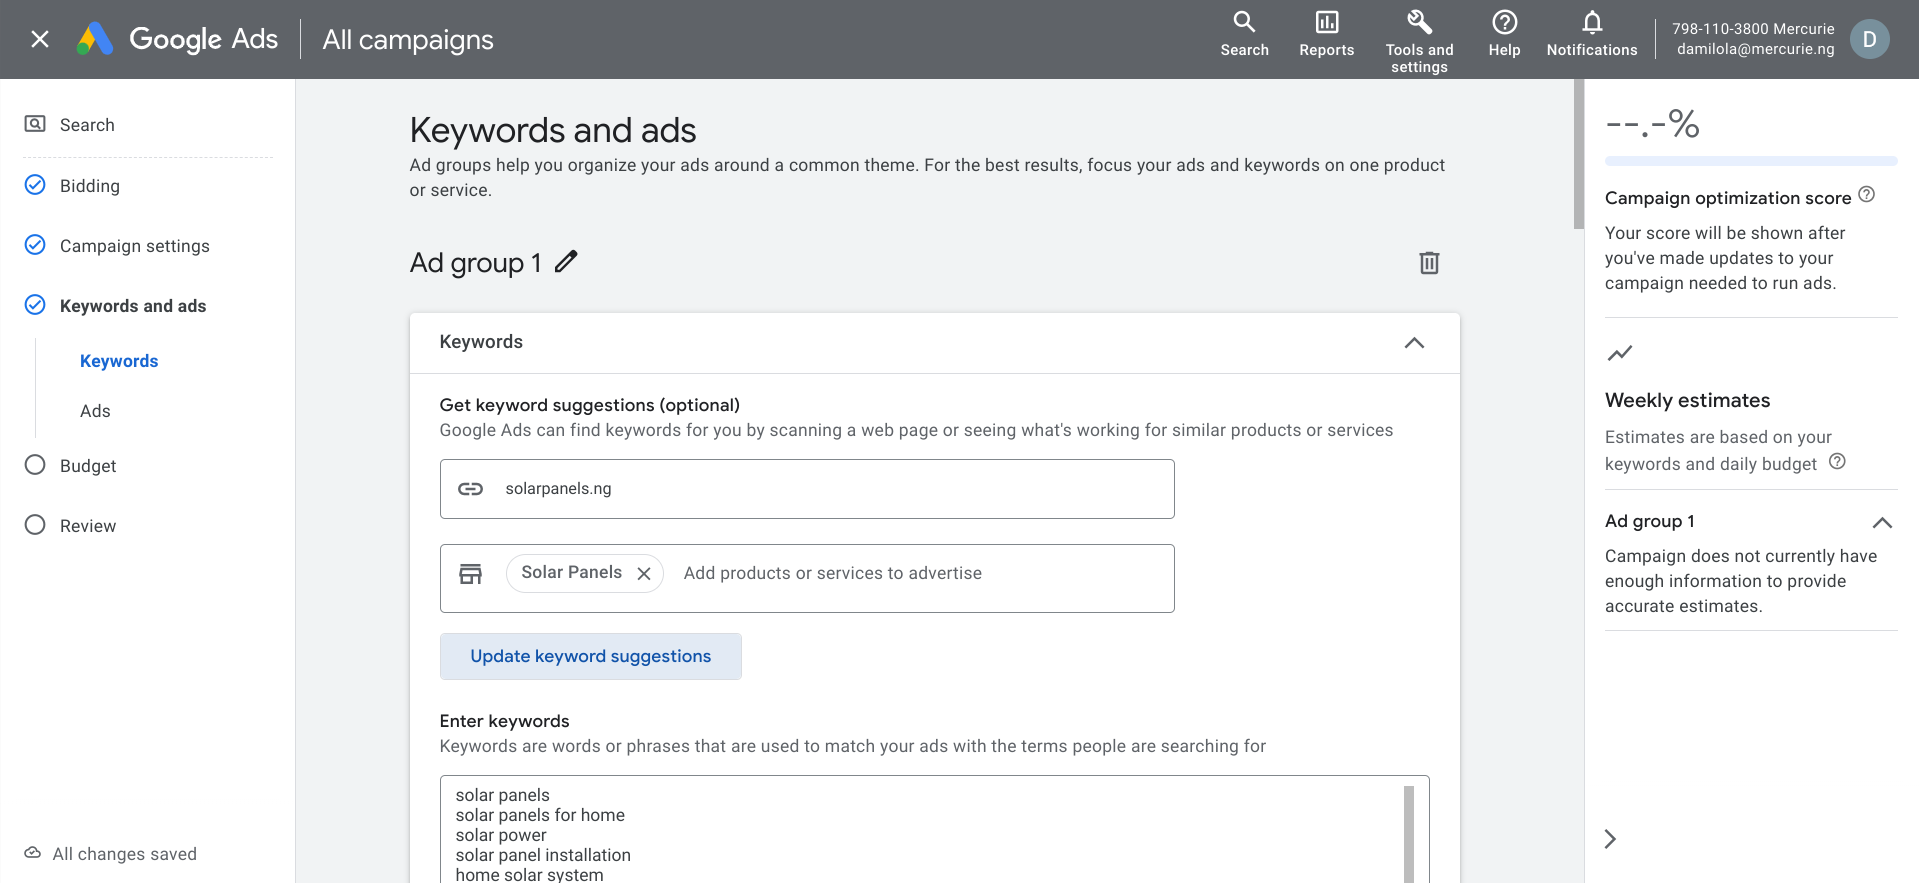
Once you enter your website’s URL and you enter the product or service you are advertising, click on the “Update keyword suggestions” and the system will auto-suggest a list of keywords for your ad.
Look through the list to be sure that they are relevant to the kind of keywords your potential customer would use when searching for your product. If they are, then click on the “Apply All” button to add them to your campaign.The Ad

Final URL and Display Path
Enter the final URL that the ad will take anyone who clicks on it to. Then next enter a display path. You can choose to skip the display path field, however, it also a way to make the ad look more relevant to potential customers. A good use case could be: let’s say we sell used solar panels in our solar panel business, we can enter a display path that reads “used/solarpanel” such that when a potential customer sees it on the search engine result page, it more relevant to what they are looking for.
Another example could be using “/lagos”, which makes it more relevant to customers who are in Lagos.
Headlines
Moving on to the Headline for your ads. This is where they system makes a lot of recommendations for you. It good to use these recommendations. Also, when writing your headline, make sure that each headlines you use are meaningful when they combine with other headlines. This is because the system dynamically combines headlines whenever it show your ad to customers. So if you have headlines that are meaningless on their own, they loose their meaning once they get swapped around.
Description Text
Next enter your description text. The system will give you some suggestions. Choose the ones that best describe your ad.
Site Links 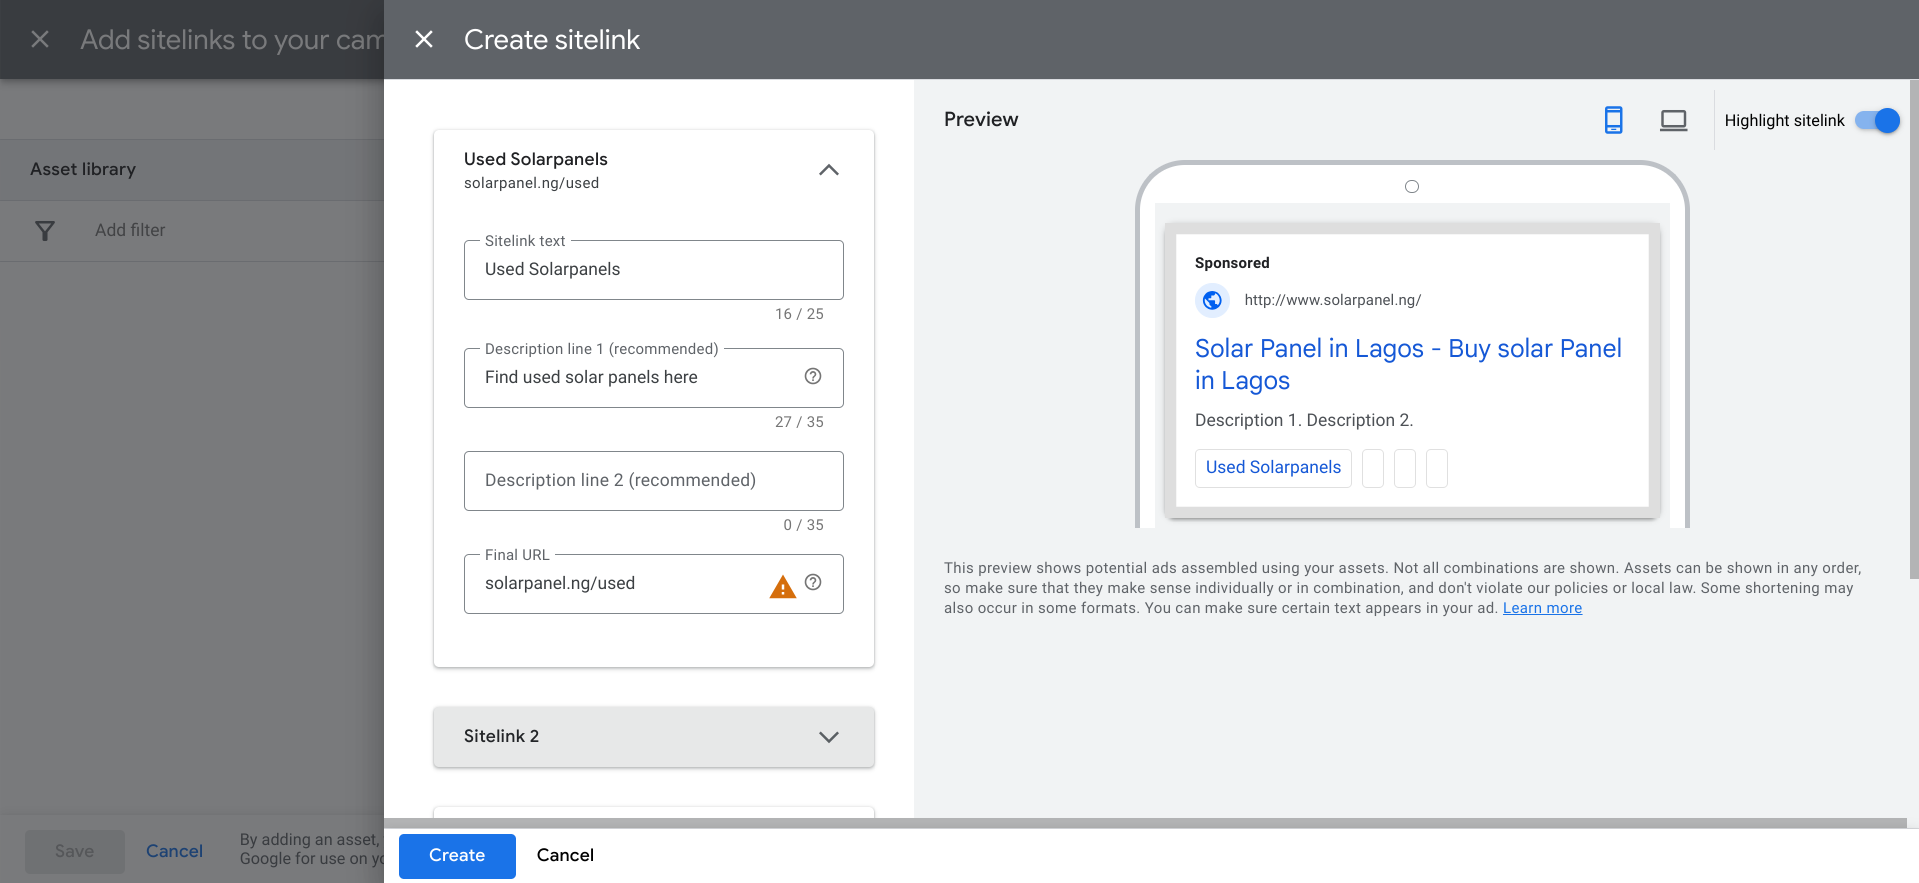 Site Links essentially makes your Ad more prominent. Sites links gives potential customers more link to interact with which ultimately improves the likelihood that you ad will be clicked.
Call outs 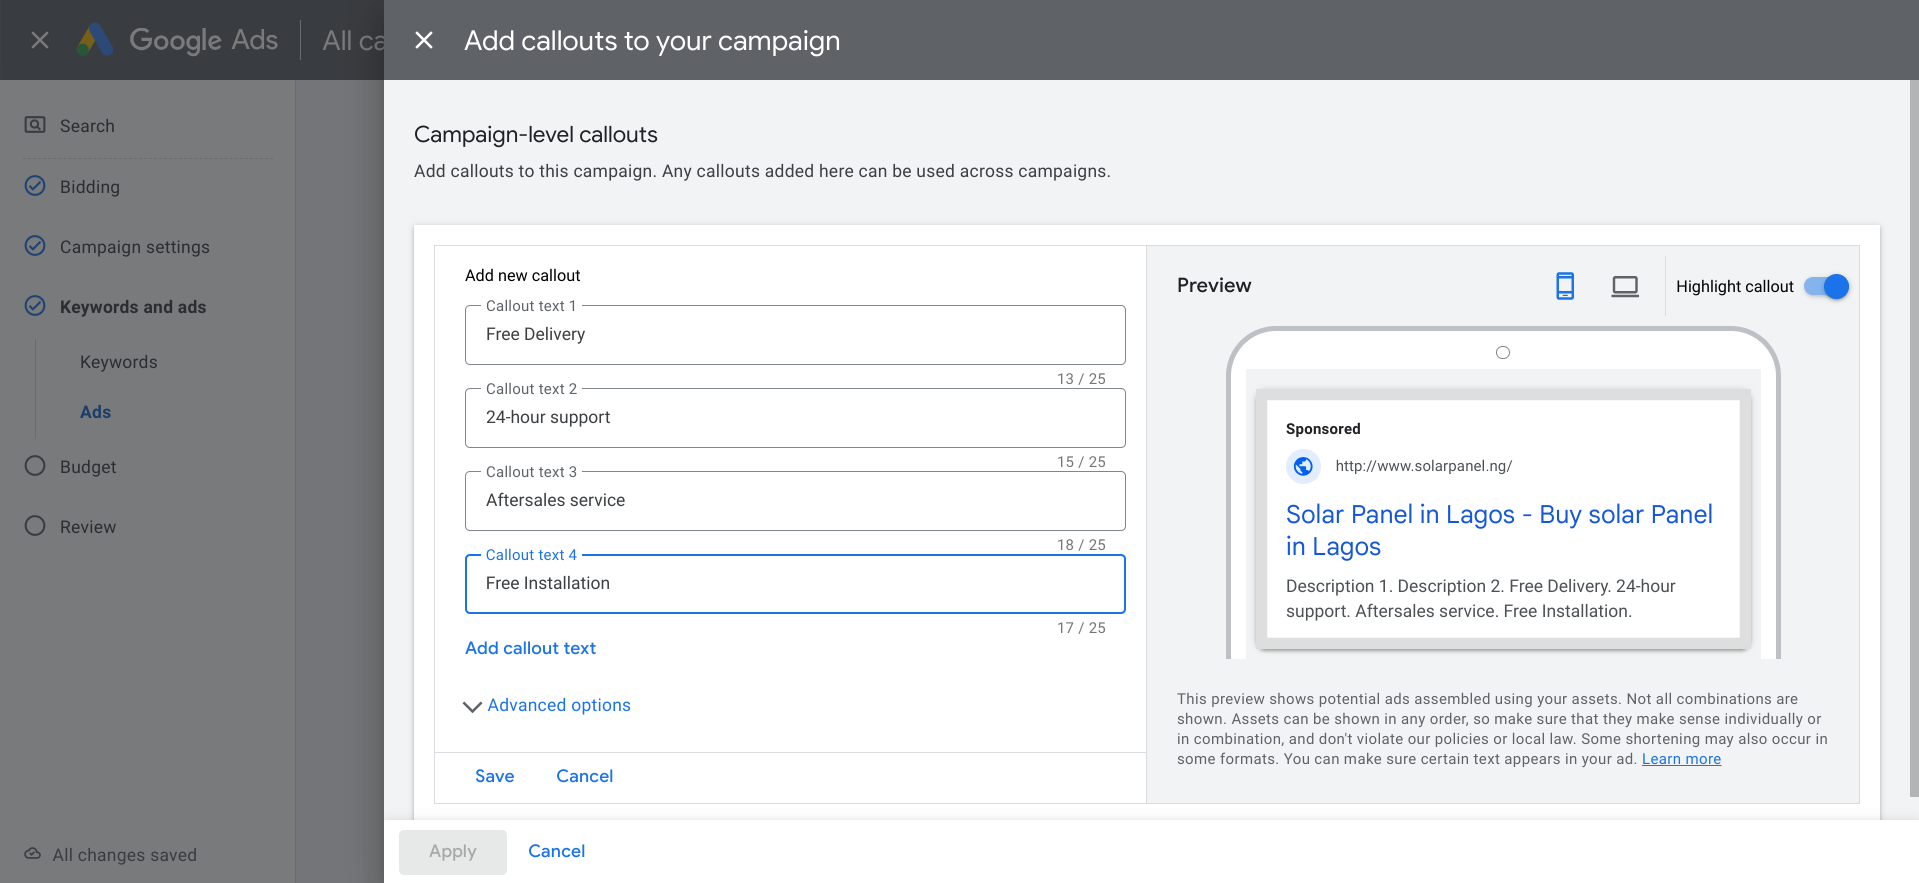 You can use callouts to improve your search ads by promoting unique offers to shoppers, like free shipping or 24-hour customer service, etc. For our solar panel business example, we can use callouts such as “Free installation”, “24-hour support”, “Free delivery” and “After-sales service”. Once you are done entering your callouts, click on save and then Apply.
Add Promotions Assets 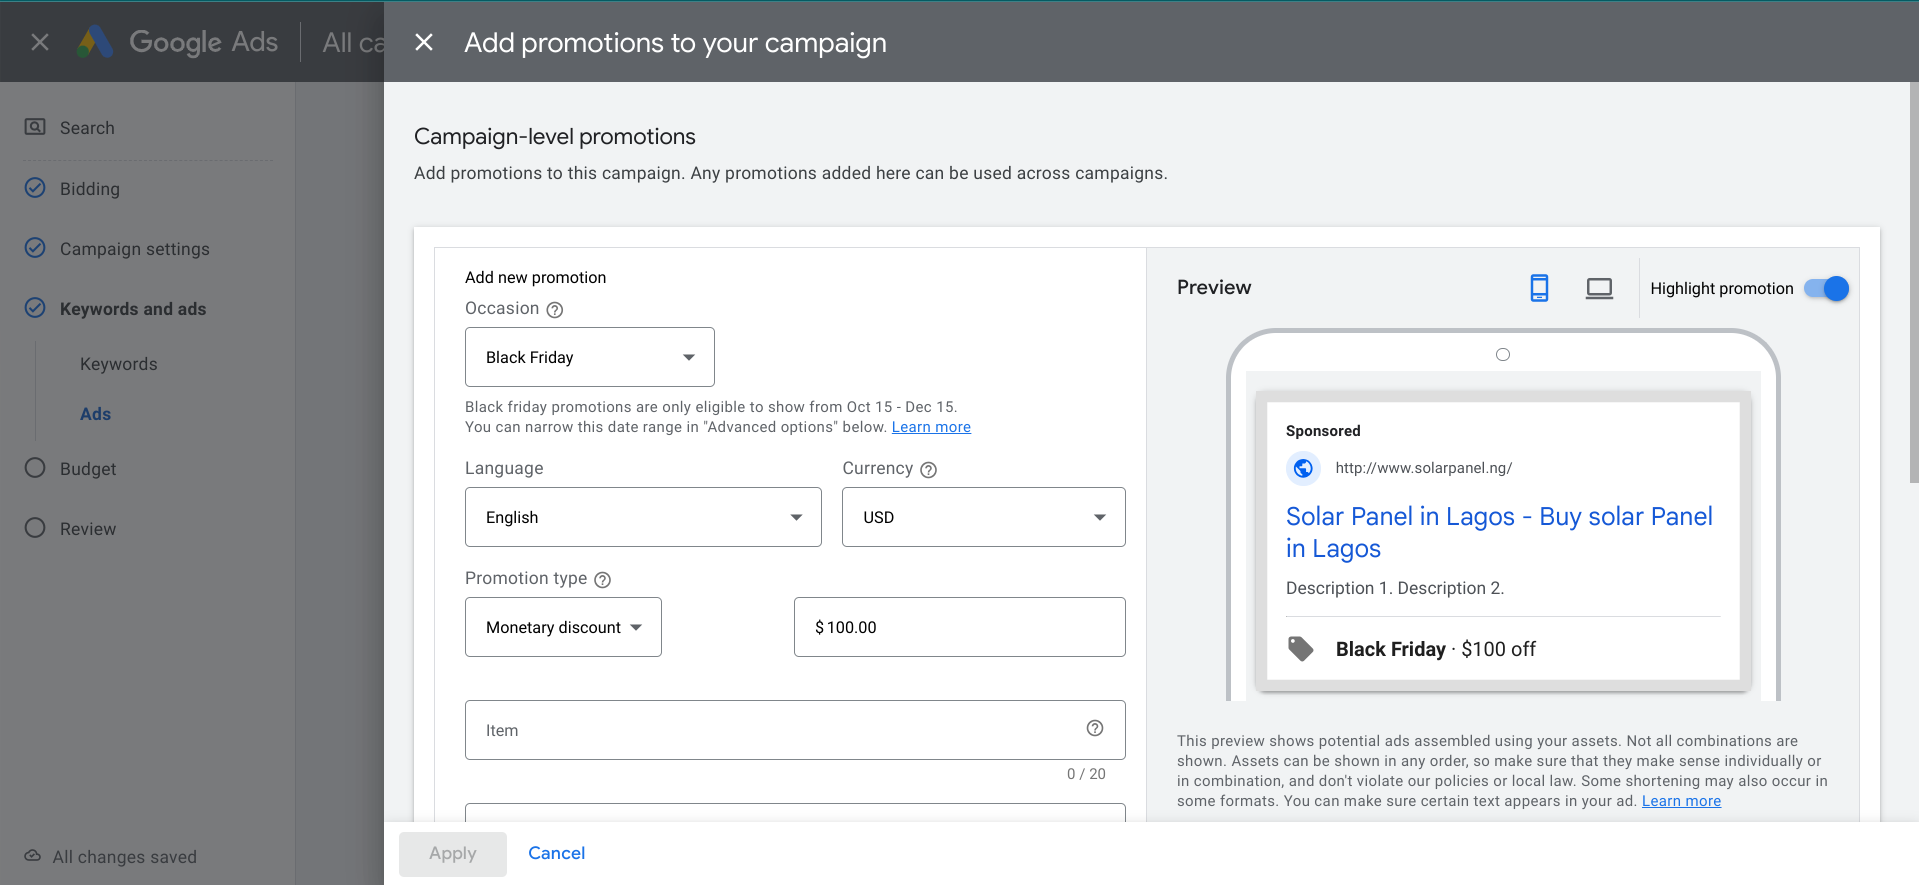
Step 11: Set a Daily Budget 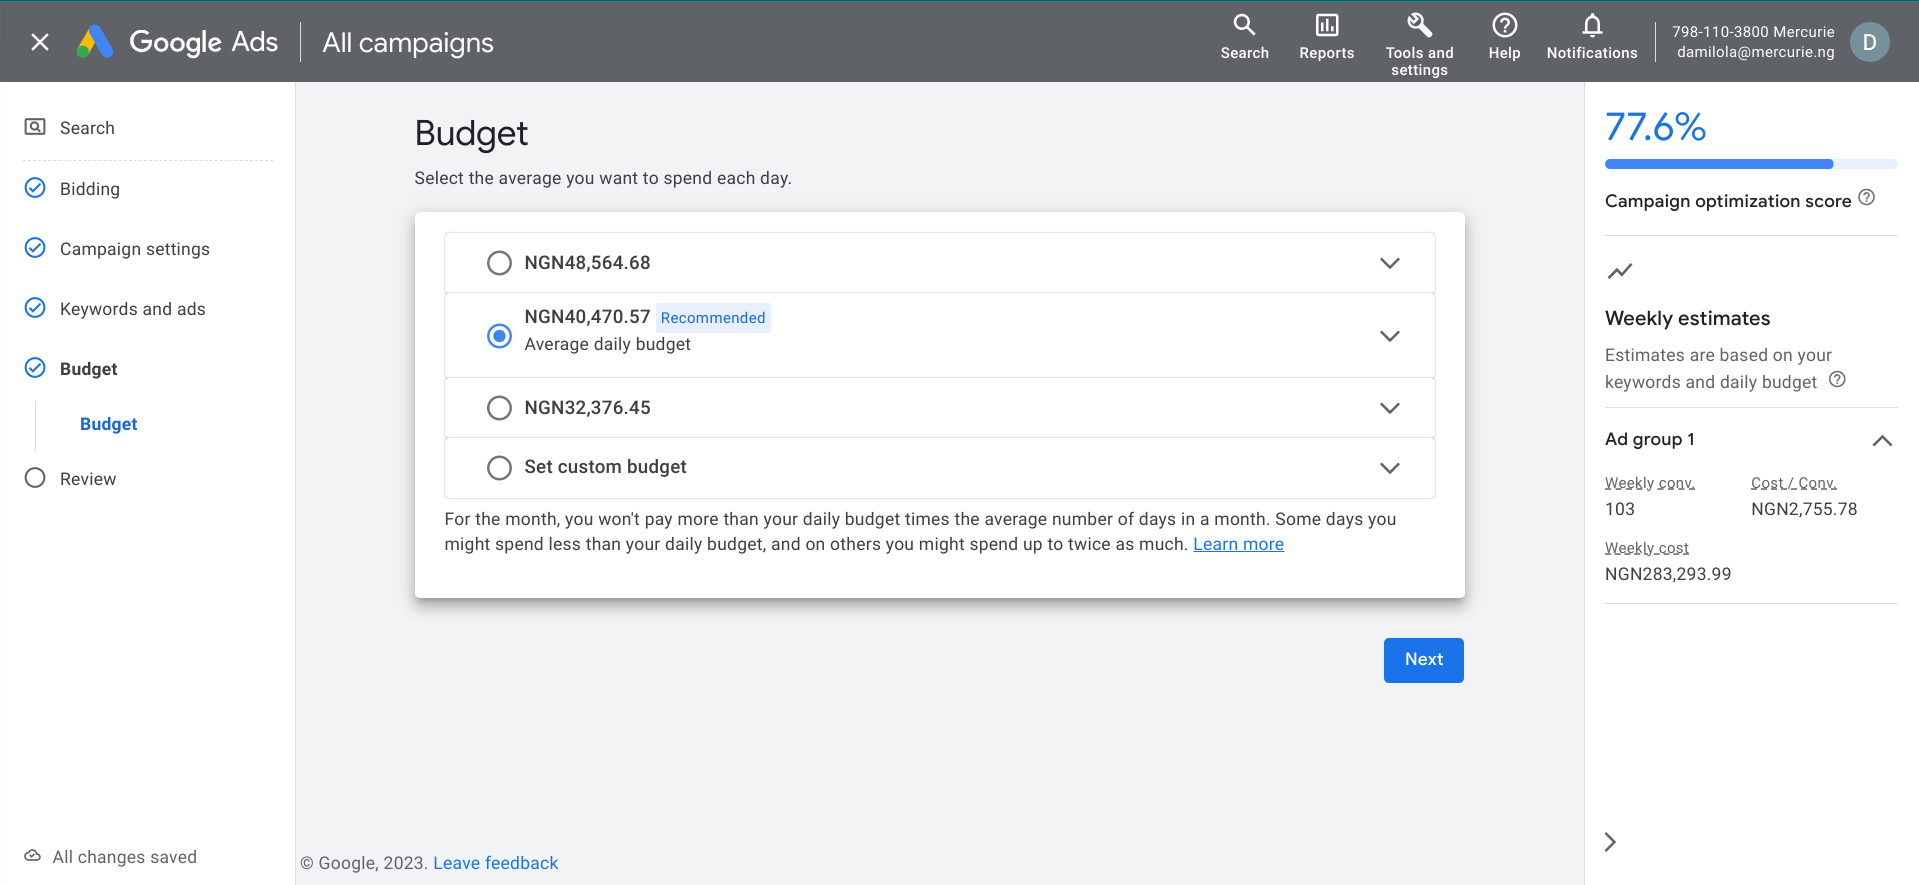
This is where you set how much you want to spend daily for your ad. There will be a number of daily budget and estimates on the conversion you would get for each daily budget scenerio. There is also a recommended daily budget you can go with. For the month, you won't pay more than your daily budget times the average number of days in a month. Some days you might spend less than your daily budget, and on others you might spend up to twice as much. Also, you can set your own custom budget, however, if your budget is lower than the recommended budget
Step 12: Review your Ad and Publish
And lastly, take a moment and go through you ad setup one last time. If you are satisfied with your ad and your Ad strength, publish it and wait for it to be approved. Once it is approved, you Ad will start running.